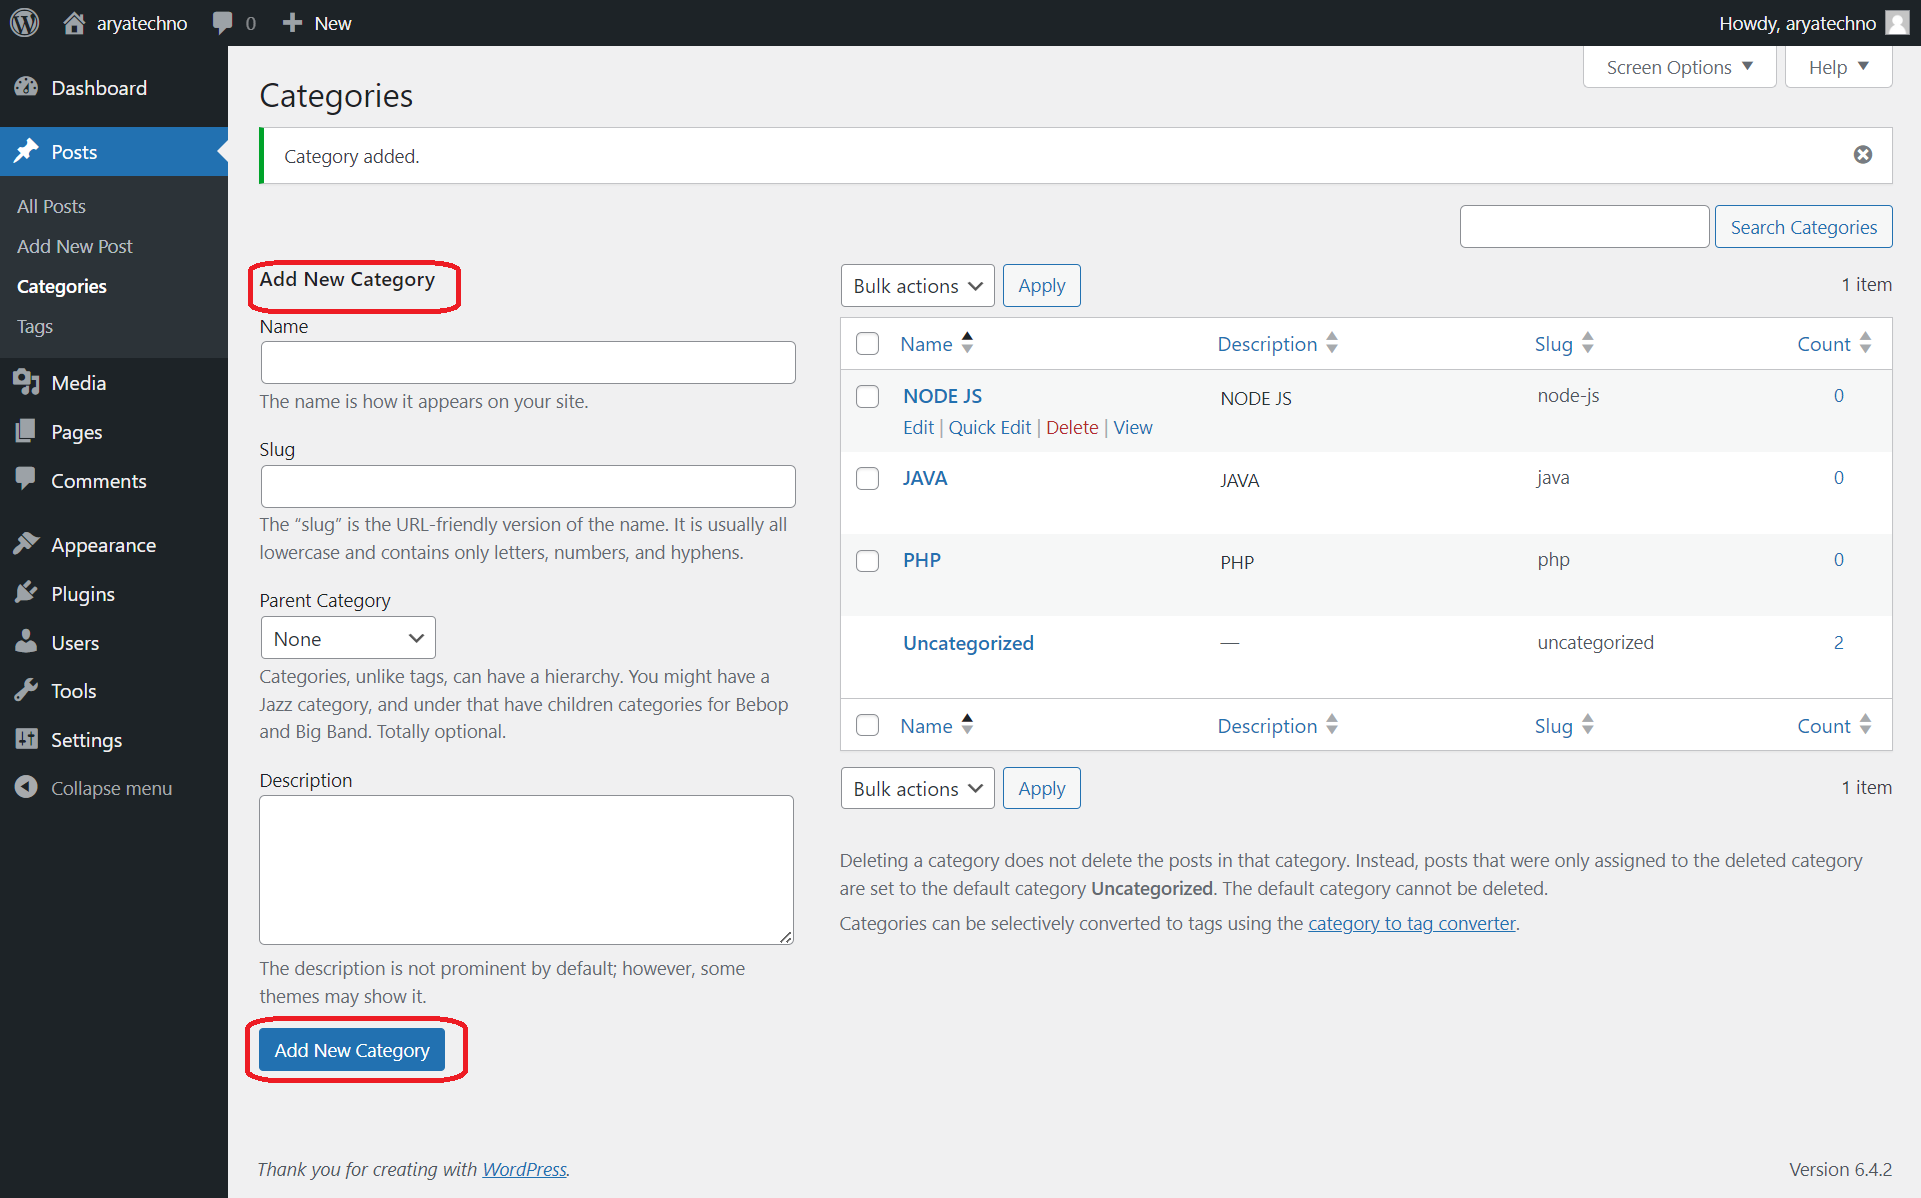
Adding a category in WordPress is a simple process. Here are the steps:
-
Login to your WordPress Dashboard:
- Open your web browser and navigate to the login page of your WordPress site.
- Enter your username and password to log in.
-
Access the Categories Section:
- In the WordPress Dashboard, find and click on "Posts" in the left sidebar.
- From the expanded menu, click on "Categories."
-
Add a New Category:
- On the Categories page, you'll see a form for adding a new category.
- Enter a name for your category in the "Name" field. This is the display name for the category.
- Optionally, you can also provide a slug. The slug is a URL-friendly version of the category name, and WordPress will usually generate it automatically based on the name.
- If you want to create a hierarchy of categories (where one category is a subcategory of another), you can choose a Parent Category from the dropdown.
- Click the "Add New Category" button to save your new category.
-
Confirmation:
- Once you've added the category, you should see a confirmation message, and your new category will appear in the list of categories.
Now, when you create or edit a post, you can assign this category to the post. You'll find the category options in the right sidebar under the "Categories" meta box.
Remember that categories are a way to organize and group your content, making it easier for visitors to navigate your site. If you're assigning categories to existing posts, you may need to go back and edit those posts to add the new category.


Comments